These activities are fun, simple and don’t require too much time to prepare. Children can work on language, social, play, fine motor, and math skills, all while engaging with their caregivers or other family members. Many of these activities can also be saved and stored away for later use.

Materials:
- construction paper
- markers
- ballons
Method:
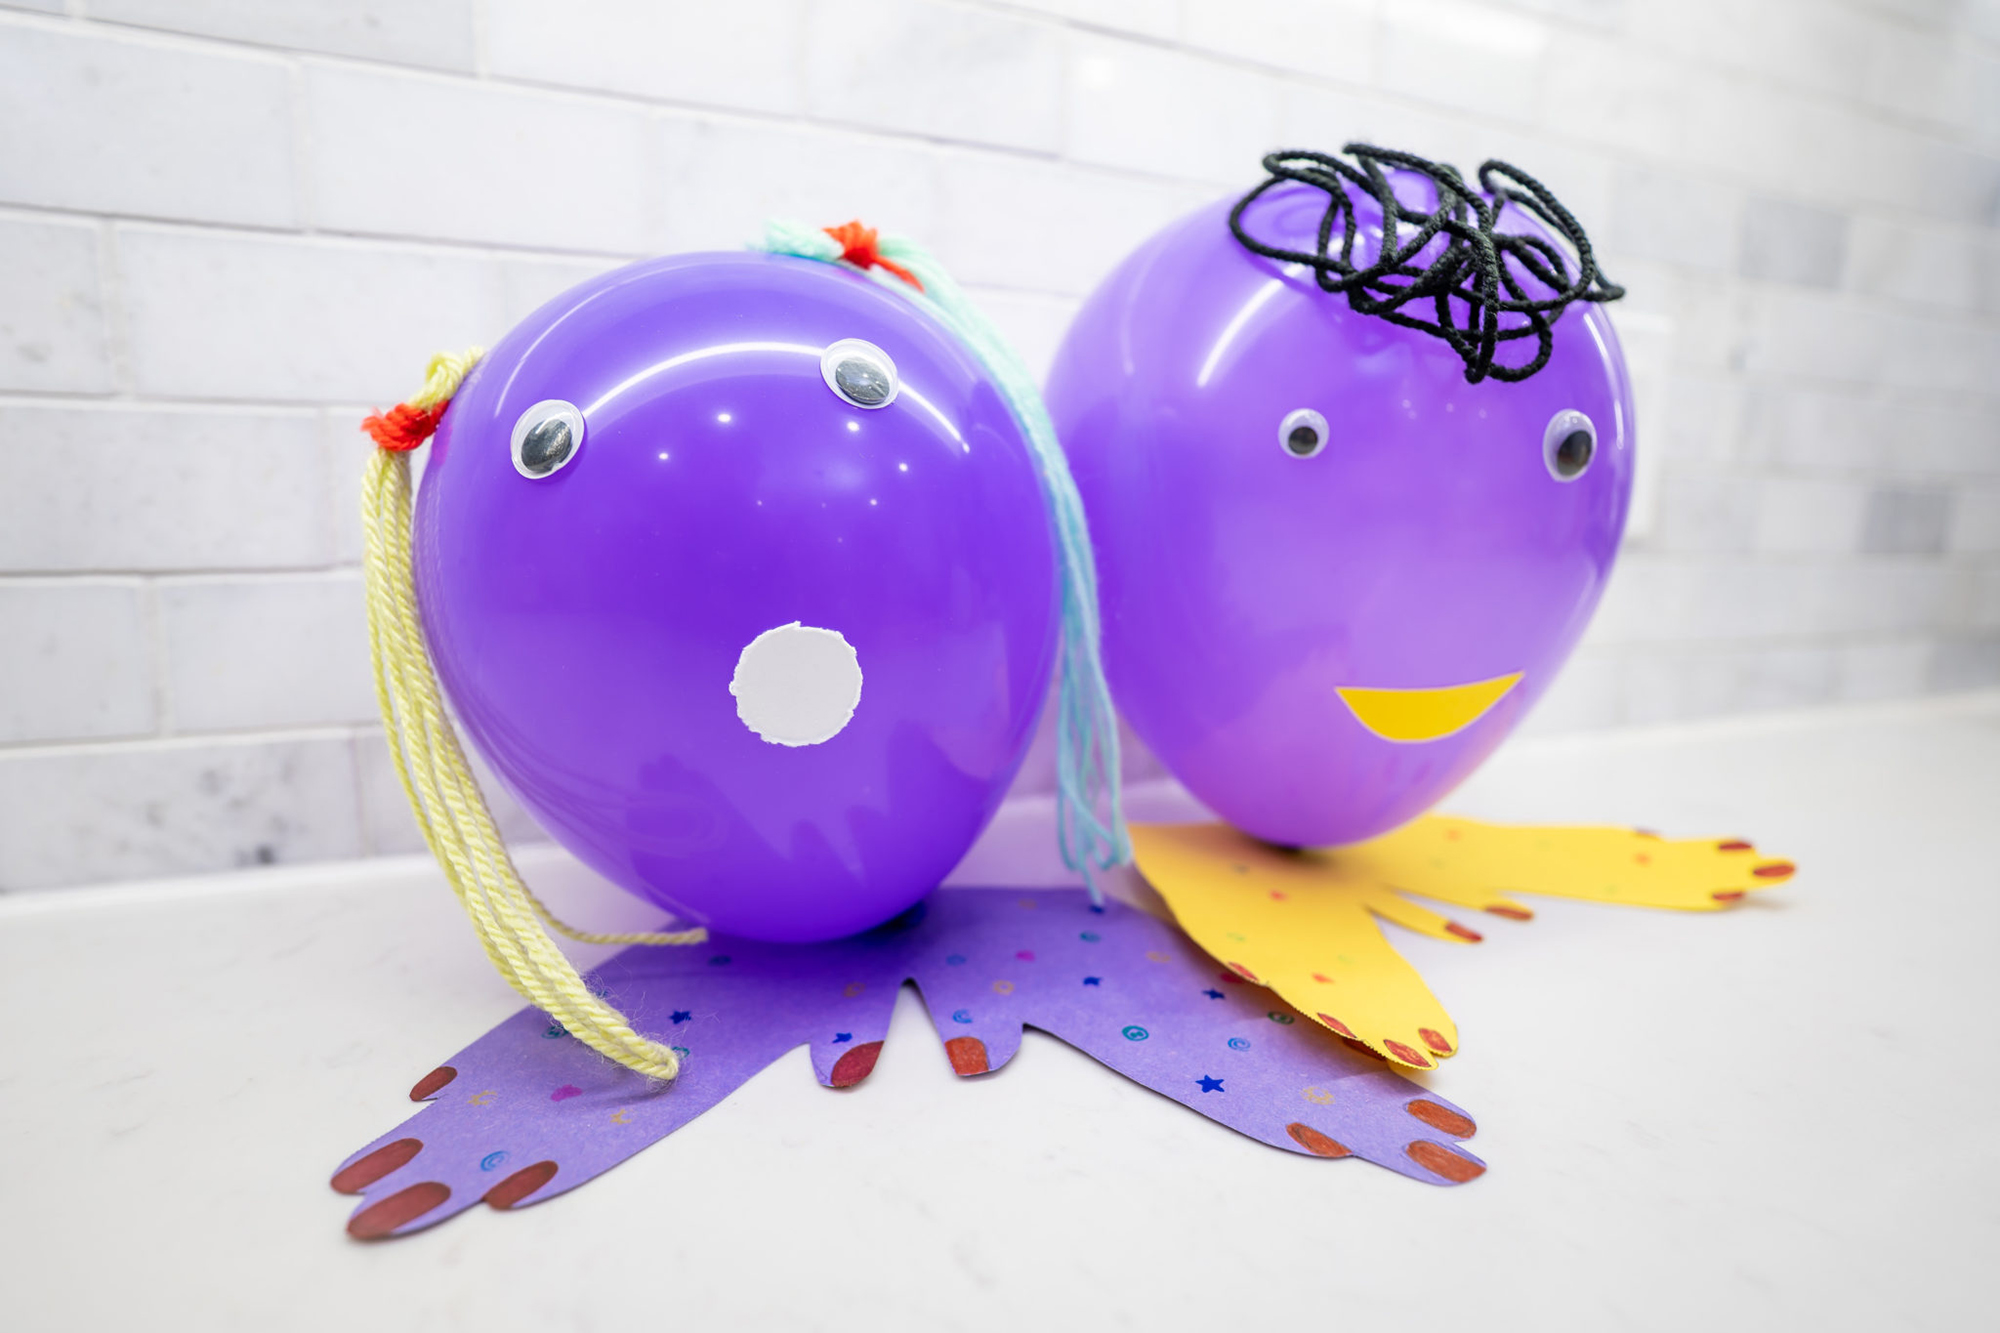
- Have child put their hands together on a piece on construction paper and trace them.
- Cut out the tracing, but remember not to cut down the middle or separate the hands.
- Decorate the hands with markers (e.g. jewelry, painted nails).
- Punch a hole in construction paper in the middle where the hands meet.
- Blow up a balloon.
- Have child draw a face on the balloon with markers. Careful not to pop it!
- Pull the tied end of the balloon through the hole in the construction paper shoes.
- Set the hands on the table and the balloon should stand up straight.
Try This:
- Glue features on such as yarn hair, button eyes etc.
- Use a variety of facial expressions such as surprised or happy
- Use a variety of materials, sticker etc.
Materials:
- watercolour paints
- paint brush
- white crayons
- white construction paper
Method:
- Have your child make a drawing using white crayons on the white construction paper.
- Encourage them to press down hard with the crayon.
- Have them paint over the drawing using watercolour paints.
- The crayon marks will emeger very clearly from the painting, especially after the paint is dry.
Try This:
- Try the same thing with an orange crayon and orange paper, yellow crayon and yellow paper etc.
Materials:
- 3 colours of tissue paper
- pale brown paint
- paint brush
- water
- black pen
- glue, 1 piece of white paper, scissors.
Method:
- Draw an ice cream shape onto the white paper using the black pen. (Don’t forget to include the cone, a couple scoops of ice-cream, and a wafer on top too!)
- Paint the cone and wafer with the pale brown paint.
- Draw a criss-cross pattern to make the cone look real
- Tear up pieces of your chosen tissue paper colour and scrunch them into small balls the size of an ice-cream scoop.
- Glue the tissue paper onto the ice-cream where the outline of the scoops are.
- Cut the whole ice cream out.
Try This:
- Use stickers or sparkles to make ice-cream toppings
Materials:
- paper plate
- pencil
- scissors
- popsicle stick
- markers
- glitter
- glue
- tape
Method:
- Using a pencil, draw an animal design on the paper plate (ensure it would fit about half of the child’s face) Some examples: cat, dog, bunny, lion.
- Cut out the mask.
- Cut holes for eyes.
- Decorate the mask using glue, glitter, and markers.
- Tape a popsicle stick to the back of one side of the mask.
- Hold up mask to face and have fun!
Try This:
- Decorate the mask with stickers
- Punch a hole on both side of the mask and tie a string through so child can wear it during play
Materials:
- cardboard
- hole punch
- marker
- scissors
- yarn
- tap
Method:
- Draw the shape of a tree on the cardboard.
- Cut out the shape.
- Punch holes around the entire edge of the tree (approximately 1 inch apart).
- Use the markers to colour the tree.
- Wrap tape around the end of the yarn and sew through the holes.
Try This:
- Make different shapes to sew (e.g. a favourite character, shapes etc.)
- Add beads, stickers, and glitter
Materials:
- an empty cardboard box (e.g. shoebox)
- different colours of tissues paper (cut into 3 inch x 3 inch squares)
- white school glue or Mod Podge
- letter and number stickers
- a foam paint brush
- small keepsakes (e.g. an award from school, a sticker, a drawing, a little toy)
Method:
- Using the foam paint brush, cover both the lid of the box and the box with glue.
- Place pieces of tissue paper on as you go and apply a light coating of glue over top. (cover the whole box)
- Let it dry.
- Once dry, pick a date in the future for when your child would like to open the box. Use the letter and number stickers on the lid of box.
- Apply glue on top of the stickers to seal it all up.
- Place small keepsakes inside of the box and then place it in a safe place (remember where you store it!)
Materials:
- empty toilet paper and paper towel rolls
- different colours of paint
- paint brush
- scissors
- construction paper (various colours)
- black marker
- glue stick
- tape
Method:
- Have child pick a pick a picture of DNA that they want to create.
- Put the food items in separate bowls.
- Insert toothpicks into candies to create an intersection and build using the picture model.
Try This:
- Use Styrofoam balls
- Use other candies


